Last night I wanted something to do to relax. I decided since I was about to decorate for Halloween that I would do a Halloween decor craft. I looked at my decor that I already had and decided that I needed BONES. - at least ones bigger than what I had. So this is what I came up with....
Here is how you make them if you want an easy relaxing project to hang out and watch Walle.
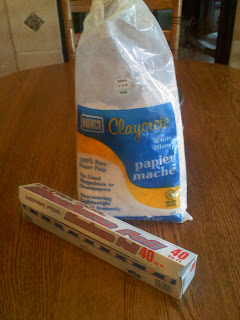
My supplies:
aluminum foil
paper mache
gesso
antique gel
foam brush
old sock
I started by mixing the paper mache in a tub..
I then made a bone shape out of aluminum foil and started to cover it with a thin layer of paper mache..
As soon as they were covered and looked like a white bone I put them in the oven on 100 with the door cracked just to help them dry faster. When they were dry they looked like this.
I then painted a light coat of Gesso all over them and let it dry. Then I took my sponge brush and dabbed antique gel into the cracks and rubbed it off with my trusty old sock.

And then let them dry and they were all done!
I will probably rearrange them a couple of times before Im ok with it but for now I have bones freshly dug up out of the grave!


16 comments:
I am a new follower from the blog hop
Living Out Loud
http://lgreenss.blogspot.com
I love your Bones, had to retweet to my 14,000+ followers. so cool
very cute, great idea!
What a great idea! Looks like you have a great family!
how fun!
Those are so great!! I need some of those for an apothecary jar!
Thanks for linking them up to Show and Tell Saturday!!
Good idea! They look great. Im a new follower, check out my blog too if you get a chance.
those looks great! i just picked up some of those tombstones from the dollar store, and can't wait to use them.
I love this idea and I have a paper casting kit I was going to give away. Now I can use it and get some great bones for Halloween.
Found your blog through Fabulous Friday.
This is a great project! So great, that I featured you on my blog! Come by and grab a button to add to your collection. ;) Have a great day!
Meg
alittleknickknack.blogspot.com
These are awesome! I've never seen that product before. Do you have to mix this paper pulp with glue? I guess if I could find the product I could read the instructions. I just love these...I definitely want to make some of these.
Wow, I am so impressed that you did this! I want some!
New follower, and I linked up too!
Megan
Great tutorial - thanks for sharing all the details! LOVE your blog...I'm a follower now!
New follower! Love these bones, they came out great!!
Thanks for linking up this weekend. I featured this today.
Found your blog through links! Love your blog!
If you ever need new recipes or want to be featured..than please come become a follower to see daily updates and email us if you would like us to feature you!!!
How neat! Thanks for linking up to The Halloween Scene!
Post a Comment